Tuesday 6 November 2012

Barley n Corn Salad

Barley  is a healthy high-fiber and high-protein whole grain boasting numerous health benefits. It adds a pleasantly chewy texture and nutty flavour to any dish. This was my first preparation with barley , got to learn this recipe from a lovely sandwich n salad lunch at a friend's place. You can substitute corn with mushroom/zucchini etc..any vegetable of your choice ! Do not throw away the water the barley was boiled in..use it in dals or as a stock for soups as it is extremely healthy.


Ingredients (serves 4)

1 cup barley
1 litre water
1.5 cups  steamed/boiled corn
2 tablespoons olive oil
Pomegranate (to garnish -optional)

For the dressing
1 tablespoon balsamic vinegar
1 tablespoon brown sugar (or honey)
1 teaspoon crushed pepper
1 teaspoon paprika (or chilli flakes)
Salt to taste
1 tablespoon fresh or dried herbs (basil/oregano)

1. In a pan, boil the water. Add the barley and let it boil on a medium flame for approximately 20 minutes. The water gets very starchy when the barley is almost cooked, also the grain increases to more than double after boiling.You can add more water if it is getting too thick and starchy.You need to test if the barley is done by taking out one grain and pressing between your fingers, the feel should be like that of cooked pasta.
2. When done, drain away the water by using a sieve. Place the drained barley under running cold water for half a minute.
3. In a pan, heat the olive oil and saute the corn for a minute or two on medium heat.
4. Mix all the dressing ingredients, add to the barley and toss in the corn..the salad tastes as nice warm as cold
Garnish with pomegranate/sesame seeds/ toasted nuts..your choice!


Sunday 28 October 2012

Cucumber Dip

Dips! For me no party menu is complete without one, hence the pressure to innovate and not repeat earlier ones :) This was a super hit, went all out with the chillies to give it a zing, you can modify as per your taste. Serve with chips (calorific but the best option!) or vegetables or lavash..


Ingredients (makes one big cup size)

1 cup hung curd
1 cucumber
1 tablespoon grated cheese or cheese spread
2 green chillies
1 tablespoon chopped herbs (fresh or dried)
1 tablespoon olive oil,plus extra
1 garlic pod
Salt to taste

1. Peel the cucumber and chop into rough pieces.
2. Put the cucumber and all the ingredients into the mixer jar and blend into a smooth dip. You can use any choice of herbs, fresh herbs preferred.
3. Garnish with olive oil and serve chilled with chips.


Monday 8 October 2012

Spiced Lauki Cake (eggless)

Everyone makes a carrot cake, so tried to experiment with a variation - lauki ! By itself, lauki (or bottle gourd ) is  a very bland tasting vegetable, so I chose to spice things up with ginger and cinnamon.To match the colour of the gourd, added some pistachios as well. The end result - a deliciosuly moist and flavoursome tea cake !


Ingredients

1/2 tin condensed milk
50 gms butter
40 ml milk
1 cup flour
1 cup grated lauki/bottle gourd
1/4 cup chopped pistachios
1 teaspoon vanilla essence
1/2 teaspoon baking powder
1/4 teaspoon baking soda
1/2 teaspoon cinnamon powder
3/4 teaspoon grated ginger

1. Pre-heat oven to 250 degrees (this temperature will be reduced later)
2. Beat the condensed milk and butter for 3-4 minutes till thick and creamy.
3. Beat in the milk at speed 1. Add the lauki and beat again tillmixed in.
4. Sieve the flour,baking powder and baking soda together.
5. Add the flour mixture in two parts, beating continuosly till folded in. Beat for further two minutes.
6. Add the vanilla essence,pistachios, ginger and cinnamon. Mix well with the batter.
7. Pour into a 5/6 " diameter tin and place in the oven center rack. Reduce the temperature to 180 degrees C
8. Bake for 25-30 minutes or till a toothpick inserted comes out clean.
9. When done, cool and remove from tray. Cut into squares and serve.


Wednesday 3 October 2012

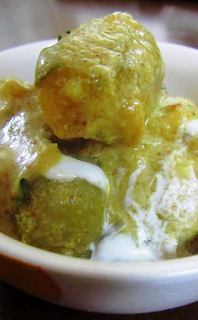
Singhi Aloo

A recent addition to my (limited) Sindhi heritage ! Singhi is Sindhi for drumstick :) so this recipe is a drumstick and potato curry .This super easy curry makes a different use of drumsticks other than sambhar. Tastes great with rice or puris or even hot phulkas..great for a sumptuous hot lunch!


Ingredients

2 drumsticks (fleshy ones)
2 medium potatoes
1 onion, finely chopped
3 medium tomatoes, grated
Salt to taste
2 tablespoons oil
1/2 teaspoon jeera
piinch heeng
1 teaspoon ginger paste
2 cups water (more for a thinner gravy)

Dry masalas
2 tablespoons coriander powder
2 teaspoons red chilli powder (as per taste)
1 teaspoon haldi
1 tablespoon amchoor powder
1/2 teaspoon garam masala

1. Heat the oil in a pressure cooker. Add the heeng and jeera and let the oil splutter.
2. Add the ginger paste and fry. Toss in the onions and cook till light brown in colour.
3. Add the tomatoes and cook till the tomatoes dry out
4. Mix all the dry masalas together and add the mixture to the cooker. Fry for a minute.
5. Cut the potatoes into big chunks, drumsticks into finger length pieces and add to the cooker.
6. Add the salt and water and cover the lid of the cooker. Put flame on high , after one whistle, reduce the flame to sim.
7. After 6-7 minutes, turn off the gas.
8. When the steam releases, serve the curry after garnishing


Monday 1 October 2012

Eggless Date n Walnut Cake

Had a packet of dates lying around in the fridge for a while now. Since I don't particularly enjoy the taste of raw dates, this cake is the best alternative to use them. Combined with walnuts, a cake that is loved by all. And it happened to be my mom's birthday the day I baked it :)

Ingredients

1/2 tin condensed milk
50 gms butter
50 ml milk
1 cup flour
2 tablespoons cocoa
1/2 cup chopped dates
1/2 cup chopped walnuts
1 teaspoon vanilla essence
1/2 teaspoon baking powder
1/4 teaspoon baking soda

1. Pre-heat oven to 250 degrees (this temperature will be reduced later)
2. Beat the condensed milk and butter for 3-4 minutes till thick and creamy.
3. Beat in the milk at speed 1.
4. Sieve the flour,cocoa, baking powder and baking soda together.
5. Add the flour mixture in two parts, beating continuosly till folded in. Beat for further two minutes.
6. Add the vanilla essence,walnuts and dates. Mix well with the batter.
7. Pour into a 5/6 " diameter tin and place in the oven center rack. Reduce the temperature to 180 degrees C
8. Bake for 25-30 minutes or till a toothpick inserted comes out clean.
9. When done, cool and remove from tray. Cut into squares and serve.


Sunday 30 September 2012

Chocolate Risotto

An experiment that worked! The starchy texture of risotto rice really works well for this pudding. You can substitute arborio rice with pudding rice as well. A really interesting twist.

Ingredients (serves 6)

1/3 cup risotto(arborio) rice
75 gm dark (cooking) chocolate,chopped
500 ml milk
1 tablespoon butter
1/3 can condensed milk
1/2 cup chopped walnuts

1. Soak the rice for an hour.
2. In a heavy bottomed pan, add the butter, milk and rice and bring to a boil on a medium flame, stirring intermittently.
3. When milk boils, reduce the flame to sim and let the mixture simmer till the rice is cooked.
4. Add the condensed milk and the chocolate and stir till dissolved.
5. Let the mixture simmer till the pudding is thick and creamy.
6. Stir in the walnuts and serve the pudding chilled.


Saturday 22 September 2012

Gujarati Panki

For those who don't know, Panki is the only reason people can wait forever to be seated in Swati snacks and I cant blame them..it is one of my absolute favourite Gujju snacks . Rice flour pancakes cooked between banana leaves, they are an addiction! Had seen this recipe on TV once where the owner of Swati snacks was a guest chef, so I am confident this is as authentic as it gets. They taste almost the same too :)


Ingredients (makes about 15 pankis)

2 cups rice flour
1 cup curd
1 cup water
2 teaspoons ginger-green chilli paste
1 teaspoon haldi powder
salt to taste
1 garlic pod,crushed
1 teaspoon dhanya powder

Banana leaves
Oil
Green chutney

1. Mix all the ingredients for the batter and leave overnight (or 8 hours atleast) to ferment. The batter should be thin, thinner than dosa batter.
2. Cut the banana leaves as per the size of your tawa. Wash the leaves and pat them dry.
3. Heat a large non stick tawa/pan. Grease the leaves with oil on the darker, shiny side of the leaves.
4. Reduce flame to slow, place one leaf on the tawa, pour 2-3 spoons of the batter and spread over the leaf. Do not pour too much batter, the batter should appear translucent after pouring.
5. Place the matching leaf on top ,with the greased side touching the batter and increase the flame to medium high.
6. When the lower leaf shrinks and turns burn, flip the leaves over so that the panki is cooked from both sides. When both leaves have shrunk and turned brown, the panki is ready
7. Remove from the gas and serve with chutney or green chilli pickle. The aroma when the panki is opened is really divine!

First leaf with batter on the tawa


Second leaf on top

Wednesday 19 September 2012

6 Katori Barfi

Happy Ganesh Chaturthi everyone !! The festival that really brings Mumbai to life ..one of my favourites too. Yes , modak is the traditional favourite but you can appease Him with anything sweet :) Hooked on to this super easy barfi recipe as easy as 1-2-3( well till 6 actually) . Learnt it from my friend's mom-in-law who calls it the 6 katori barfi as that's how easy it is to remember

Ingredients (makes about 24 squares)

1 katori milk (I use skimmed milk)
1 katori besan
1 katori ghee
1 katori dessicated coconut
2 katoris sugar

1. In a thick bottomed kadai (important), mix all the ingredients together.
2. Then place the kadai on a slow flame and start mixing the ingredients again slowly. This is all you need to do for about 20-25 minutes, with mixing required less in the beginning and more towards the end.
3. The mixture is ready when you notice the sides and the bottom of the kadhai turning brown and you need to scrape the sides more often. The mixture would have also reduced by almost half by now into a sticky mixture.
4. Pour onto a greased thali and spread out to to about 1 cm thickness. Garnish with coconut and elaichi powder
5. Cool and cut into squares.


Thursday 6 September 2012

Veg Seekh Kabab

An all time veg favourite appetiser of mine..finally decided to have a go at it myself! Mighty pleased with the results..going to be on most of my party menus henceforth.
I used an electric tandoor for this dish, you can use whatever you use at home for baking/grilling etc..nothing better than an outdoor barbecue grill!

Ingredients
2 medium boiled potatoes,mashed
1/2 cup grated paneer
1/2 cup mixed boiled vegetables (carrot ,peas) , mashed
1/2 teaspoon garlic paste
1 teaspoon ginger paste
2 chopped green chillies
salt to taste

For the dry paste
1 tablepsoon khus khus (poppy seeds)
3 tablespoons besan
1 tablespoon shahi jeera
1 badi elaichi
2 green elaichi
1 teaspoon chaat masala

To serve
Green chutney
Chat masala

1. Pre-heat oven to 250 deg Celcius or tandoor.
2. Dry roast the paste ingredients on a tawa on a medium flame till the besan turns into a medium brown color (or when you can smell the roasted besan )
2. Cool and grind into a fine powder
3. Add the paste to other ingredients and mix well.
4. Divide into small balls.
5. Take the kabab wooden sticks and grease each one lightly.
6. Place the mixture ball on your palm, flatten slightly . Press the stick onto the mxiture. Then close the mixture around the stick and using both hands spread the mixture along the length of the stick taking care not to let it break..can take a little pratice!
7. Spread the sticks onto the greased tray of the oven/tandoor and brush the top with oil/butter.
8. Bake till it looks like a tandoori dish :) (slighylty charred ) ..time depends on the heat and temperature settings of your tandoor/grill/oven
9. Remove from the sticks with a fork and cut into finger sized pieces and serve hot !


Saturday 1 September 2012

Chocolate Gulab Jamun

Re-starting my blog with a sweet surprise ..chocolate filled gulab jamuns! There is no recipe really..the name is what the recipe is.
I read this recipe in an in-flight magazine once and was waiting to try it out..came out as delicious as expected. I use Chitale Gulab Jamun mix for the recipe, you can try the same with any other mix, follow the measurements for the water as printed on the pack. I used regular dark cooking chocolate, you can use any chocolate you like. Serve hot ! That way the chocolate inside has melted when you bite into these delights :)

Ingredients

For the gulab jamun

One packet (200 gms) gulab jamun mix
120 ml water
1 cup chopped chocolate pieces, size of chick pea grains

For the sugar syrup
3 cups water
3 cups sugar
2 elaichi
1 cinnamon stick
1 clove

Oil for frying

1. Heat the oil in a heave bottomed pan.
2. Mix the water and the powder mix and knead into a soft dough. The mixture dries quickly so you need to be quick.
3. Take a small amount of dough, flatten it on your palm, place the chocolate piece on it and then roll the edges over the chocolate piece. (See photo below)
4. Do the same step for the entire dough. Fry the balls on a medium flame till a dark brown colour on all sides.
5. For the sugar syrup boil all ingredients till you get a one thread sugar syrup (to test place a drop of syrup and your thumb, press your index finger over it and then separate the fingers slowly. The syrup between the fingers should form an unbroken single thread)
6. Soak the gulab jamuns in the syrup till nice and fluffy and then serve hot. Even better really hot with ice cream !


Sunday 8 July 2012

Easy Avial

With no offense to any Keraliites reading this..this is my cheat version of a true family favourite - Avial. Best served hot with steamed rice and poppadum :) You can choose your choice vegetables but my favourites are - beans/carrot/snake gourd/peas/yam/pumpkin (kadoo)/drumstick...no potatoes/cabbage/cauliflower! The unique taste is because of the vegetables used..also the quantity and thickness of the coconut milk depends on how thin/thick you like the curry to be..

Ingredients(serves 4)

3 cups mixed vegetables(sliced/diced)
2 tablespoons vegetable oil
1-2 tablespoons coconut oil
8-10 curry patta leaves
1 teaspoon rai seeds
pinch heeng
1 green chilli, sliced
2 dry red chillies, halved
Salt to taste
1 cup beaten curd,should be slightly sour
2 cups thick coconut milk (use fresh preferably)

1. Heat the cooking oil in a kadhai. Add the heeng and the chillies. Once fried, add the rai seeds.
2. Add the curry patta leaves and toss for a few seconds
3. Add the vegetables and salt.Cover the lid and leave on slow flame till all the vegetables are cooked through. You can add the vegetables like beans/yam/carrot which take longer to cook first, then add the rest when these are half done. 
4. Add the coconut milk and bring to a boil.
5. Add the curd and turn off gas quickly after one boil.
6. Pour the coconut oil over the avial and serve hot with rice..really lip smacking!


Thursday 28 June 2012

Roasted Bell Pepper Salad

Been a while since my last post..couple of recipes pending to be posted ! This was supposed to be a filling for tex-mex Fajitas, but ended up being devoured as a salad by a friend on a serious no-carb diet :) So use the  dish as you please..a filling for pancakes/crepes/fajitas/frankies or a side dish or a salad (cold/warm)..

Ingredients (serves 4)

2 red bell peppers, cut into thin long slices
2 yellow bell peppers,cut into thin long slices
1 large onion, finely sliced
1/2 cup paneer, cubed
1 tablespoon brown sugar
2 tablespoons olive oil
1/2 teaspoon crushed garlic
2 tablespoons balsamic vinegar
Few leaves fresh basil
Salt to taste
Crushed black pepper

1. Heat the oil in a light bottomed pan. When hot, add the garlic and toss for a few seconds, do not let it brown.
2. Add the onions and saute on high flame till brown .
3. Add the peppers and saute on high flame till roasted brown and almost cooked.
4. Reduce the flame, add the sugar and balsamic vinegar to caramelize all the juices and give a lovely coating.
5. Add the salt and pepper and turn off the gas. Toss in the paneer.
6. Garnish with chopped basil..Serve warm


Monday 11 June 2012

Eggless Chocolate Tarts

Most of my school pocket money was spent in buying these delectable chocolate tarts from our school canteen..which later I found out were sourced from the CCI club..so I sm sure a lot of the SoBo folks are familiar with what I am talking about..not sure if they are still sold there..anyway tried these for a dinner party and were a runaway hit..I made really mini tarts , bake them in bigger muffin cups and you can have larger tarts..only thing missing was the silver sugar balls to decorate them :(

Ingredients (makes 36 mini tarts)

For the tart cases
1 1/4 cup flour
1/3 cup butter ,at room temperature
Cold water ,  about half cup

For the filling
150 gms dark cooking chocolate
75 ml cream (cooking cream like Amul)

1. Pre heat oven at 200 degrees Celcius
2. Rub in the butter with the flour to get a crumb like texture. Add the cold water a little at a time and knead till you get a smooth dough .
3. Divide the dough into 3 parts. Roll out each part on a lightly floured surface into a thin thickness circle..till the dough almost appears translucent, roughly 1/4 cm thick. Prick all over with a fork.
4. Cut into circles as per muffin size (see photo 2)
5. Place the circles in the greased muffin moulds. Roll out the remaining dough left after the cut outs are done to get more muffin cases.
6. Place the muffin trays on the center rack for 14-18 minutes or till golden brown in color. Remove from oven and cool
7.For the filling , place the chopped chocolate in a glass bowl and microwave for 1 minute. Whisk in the cream will you get a smooth filling without any lumps.
8. As this hardens quickly, fill the tart cases with a spoon ful of the mixture.
9. Repeat this with the remaining dough to make more tarts
10. Serve chilled...


Monday 4 June 2012

Stuffed Parwal Curry

I know this is not a favourite of many but then again depends how you make it :) googled to find other names for this veggie..got two - potol and pointed gourd .
Have cheated on the name as most of the stuffing comes out while cooking but the flavours still linger inside the parwal with the stuffing done prior to cooking..try this at your next dinner party for a lovely slightly sweet but packed with flavours dish

Ingredients (serves 4)

8-10 parwals, peeled

For the stuffing
1 tablespoon coriander powder
2 teaspoons amchoor powder
1 teaspoon haldi powder
1 teaspoon salt
1 tablespoon garam masala
1tablespoon red chilli powder

For the gravy
1 tablespoon ginger-garlic-green chilli paste
2 onions, finely chopped
1 elaichi
1/2 inch dalchini stick
2 tablespoons oil
8-10 cashewnuts soaked in little water,grind to a fine paste
1 1/2 cups water
Salt
1 teasoppon sugar

For garnish
Few kasuri methi leaves
Cream

1. Slit the parwals lengthwise. Divide the stuffing among the parwals and place the stuffing along the slit.
2. Heat oil in a kadhai, add the elaichi and the dalchini stick. Add the ginger-garlic-chilli paste and fry for few seconds.
3. Add the onion and cook till light brown in color.
4. Toss in the parwals with a little salt and cover with a lid. Cook on slow flame for 6-7 minutes till browned from edges.
5. Add the water and again cover with lid to cook till parwals are completely tender.
6. Add the cashewnut paste and sugar. Cook for another 2-3 minutes on slow flame.
7. Turn off gas and serve hot with garnishing

Saturday 2 June 2012

Broccoli n Pineapple Salad

Summer !  Beat the heat with this refreshingly cool salad. Great combination of salt and sweet flavours..


Ingredients

1 medium broccoli, cut into florets
2 cups chopped pineapple
10-12 lettuce leaves
1/4 cup black olives
2 tablespoons olive oil
1 teaspoon garlic
1 teaspoon black pepper
1 tablespoon balsamic vinegar
Salt to taste

1. Heat the olive oil, add the garlic and toss for a few seconds. Stir in the broccoli and cook on medium flame till the broccoli becomes bright green in colour and turns slightly limp.
2. Add the salt, pepper and turn off the gas. Cool slightly and and add the pineapple pieces.
3. Toss in the balsamic vinegar
4. In your salad bowl, arrange the leaves along the sides of the bowl and place the salad on the leaves. Garnish with olives and serve chilled


Monday 28 May 2012

Sai Bhaji...a Sindhi favourite

One of the very few Sindhi dishes I have learnt from my mom..but an all time favourite in my house. Nothing better for lunch with raita, papad (off course!)
and bhugar chawal (recipe to follow soon ..) or even plain steamed rice works great..plus all the goodness of spinach packed in !

Ingredients (serves 4)

1 cup chana dal, soaked for 2 hours
1 large bundle spinach, finely chopped
1 cup dill (sepu) , finely chopped
1 large onion, finely chopped
1 tomato, finely chopped
1 teaspoon ginger-green chilli paste
1/2 teaspoon chopped garlic
2 cups water
1 bayleaf
1 teaspoon jeera
1/4 teaspoon heeng
Salt
1/2 teaspoon haldi
2 tablespoons ghee (or oil)

1. Heat the ghee in a pressure cooker. Add the heeng, jeera and bayleaf.
2. Add the garlic, ginger-green chili and fry for half a minute.
3. Add the onions and cook till light brown, on medium flame
4. Add the tomato and cook for 3-4 minutes.
5. Add the spinach,dill, salt, haldi and chana dal. Toss well. Add the water , cover the lid and place cooker on high flame for 2 whistles.
6. Reduce the flame and let it simmer for another 5-6  minutes.
7. Turn off the gas and let the steam release.
8. After opening the cooker, lightly mash the dal with a wooden ladle (or the wooden lassi churner)
9. Serve hot ! You can even add a tadka of ghee and dried chillies..


Friday 25 May 2012

Mango Rasmalai

Hello people! I am back from a lovely holiday in the Andamans..a place I highly recommend for gorgeous blue waters, fresh air added to a great dose of history ! I also ate the tastiest rasgullas there ,cooked by a Bengali chef no doubt. The taste was almost like a cross between a gulab jamun and a rasgulla and it was wow!
Back home and missing that divine taste, I bought tinned rasgullas.. only to be greatly disappointed..so combining the left over not-so-tasty rasgullas with some alfonso mangoes..a super quick and yummy dessert!

Ingredients (serves 6)

12-14 rasgullas
1 cup rasgulla sugar syrup (they are dunked in a lot of it!)
Half litre  milk
1 largo mango, pureed
1/2 teaspoon rose water
1/2 teaspoon elaichi powder
2-3 saffron threads
Pistas to garnish.

1. Boil the milk. Cool slightly (do not discard the light cream layer that forms). Add the sugar syrup ,rose water, elaichi and the mango puree.
2. If the mango pulp does not dissolve completely, churn the whole mixture in a blender for a few seconds.
3. Lightly flatten each rasgulla and squeeze out extra sugar syrup. Drop the 'squeezed' rasgullas in the milk mixture.
4. Garnish with saffron and pistas and leave to chill for 4-6 hours. Serve chilled !

Thursday 10 May 2012

Chocolate n Bailey's Cheesecake

This was a 5 minute dessert (except for the setting time) ..so easy and so delicious. No-bake and eggless..just use good quality cooking chocolate , and for best results use dark cooking chocolate. I made mine in individual wine glasses..you can make it in a tray. And don't skip the Baileys :)) it added a lovely flavour


Ingredients (serves 8)

175 gm dark chocolate
200 gm cream cheese (or mascarpone)
5 tablespoons powdered sugar
75 ml cream (regular cooking cream like Amul)
25 ml Baileys liqueur
12 Bourbon or any chocolate biscuits
50 gm butter

1. Melt the butter . Powder the biscuits in the mixer and add the to the butter. Mix to get a fine crumble.
2. Line the base of your dish with the biscuit layer (or line each individual glass/bowl) The dish should be roughly the size of a medium baking dish..Leave to set in fridge for half an hour
3. Melt the chocolate for 1 minute in the microwave. Beat in the cream,sugar, Baileys and the cream cheese with an electric beater till creamy (2-3 minutes)
Spread the mixture over the biscuit layer.
4. Garnish with chocolate curls/sprinkles..chill for few hours till set.
Divine!!


Monday 7 May 2012

Mango Salsa

A fresh twist to the regular sauce. Use slightly sour mangoes for the perfect blend of flavours..which I dint achieve :( as I used Alfonso mango which is too sweet to be used for this recipe. Will turn out better with the other varieties like Dasseri, Totapuri etc..This salsa makes a great dip with chips or just as an accompaniment to sandwiches ,salads, mexican dishes..

Ingredients (makes 1 large cup)

2 medium tomatoes
1 medium onion, finely chopped
1 green chilli, finely chopped
1/2 cup chopped mango
2 tablespoons finely chopped coriander leaves
Salt to taste
1 tablespoon white vinegar


1. Roast the tomatoes till blackened all over on the gas flame. Cool and peel. Chop finely.
2. Mix with all other ingredients and serve chilled


Wednesday 2 May 2012

Mango and Coconut Trifle Pudding

Coconut and Mango..two great tropical products that actually work really well together. Thought of adding a coconut twist to a personal favourite..trifle. Trifle pudding is one of the greatest deserts of all time in my opinion, simply because u can add anything to it and it still tastes great..I made mine in individual glasses, you can make this in a big pudding bowl. I used store bought sponge cake, just sprinkle some mango juice/coconut milk/plain milk when making the layers so that the cake stays moist ..yum !


Ingredients (serves 6)

2 mangoes, peeled and chopped finely
Vanilla sponge cake (approx 250 gms)

For the pudding
1/2 litre skimmed milk
4 cups vanilla custard powder ,dissolved in 3/4 cup milk
3/4 cup coconut powder (dessicated coconut)
3/4 cup sugar

1. Heat the milk to a boil. Reduce to a simmer and add the dissolved custard powder.
2. Stir with a whisk to and let the mixture simmer on a reduced flame.
3. After the milk thickens, add the sugar and coconut powder ,simmer for 2-3 minutes ,stirring continuously.
4. Turn off the gas and cool.
5. To assemble the pudding, make alternate layers of cake,mango and pudding, finishing with mango on top. You can soak the cake with a little mango juice or even coconut milk to make it more moist.
6. Make as many or as little layers as you prefer...chill for 2-3 hours at least before serving.


Thursday 26 April 2012

Lemon and Basil Spaghetti

I am stuck with a whole lot of lemons in my fridge and wondering what to do. Had asked for Kafir limes from someone visiting Thailand, but got gifted few dozens of regular limes.Lesson learnt ! When asking for exotic ingredients always send a picture and a detailed description :) But making the most of what I have, this turned out to be a great summer lunch dish..more like a salad though..fresh and light. Next up soon..lemon cake :)

Ingredients (serves 2)

2 cups boiled spaghetti
2 cups assorted chopped vegetables (bell peppers,corn,zucchini..etc)
2 tablespoons olive oil
2 tablespoons lime juice
1 teaspoon grated lemon rind
1 teaspoon sugar
1 teaspoon crushed garlic
1 tablespoon black pepper
12-15 basil leaves
Salt
Olives to garnish
Parmesan cheese

1. Heat the olive oil
2. Add the garlic and toss for a few seconds.
3. Add all the veggies and the salt, cover with a lid and leave on sim for 4-5 minutes till tender but still crunchy
4. Add the spaghetti, lime juice, lime rind, basil leaves, pepper, sugar. Stir fry for 1-2 minutes.
5. Serve hot , garnished with olives and parmesan cheese.

Monday 23 April 2012

Mango Kulfi

Anyone having met me recently would clearly notice that mango certainly doesn't suit my skin ..having teenage acne all over again ! but who cares !! it's a small price to pay for one month of delight for the taste buds. Tried kulfi for the first time..super easy and yummy..just make sure you are using Alfonso mango or any other really sweet variety as even a slightly sour mango will split the milk and you'll be left with a tub of mango paneer :) And for the real deal, use whole milk..come on, give in to life's REAL pleasures once in a while!

Ingredients  (serves 4)

2 cups milk
4 tablespoons condensed milk
2 tablespoons cornflour dissolved in 1/2 cup milk
Pulp of 2 mangoes
2 tablespoons crushed pistachios
1/4 teaspoon elaichi powder

1. Bring the milk to a boil. After boiling, reduce to simmer and add the condensed milk.
2. Simmer for 1-2 minutes. Add the cornflour paste,elaichi and let the milk simmer on a low flame for 3-4 minutes till thickened.
3. Turn off the gas, cool slightly and whisk in the mango pulp . Pour into an airtight container or kulfi moulds, garnished with the crushed pistas.
4. Freeze for 5-6 hours or till set and serve with chopped mangoes :)


Friday 20 April 2012

Thai Pineapple Salad

Summer recipes continue..thought I'll make a Thai flavoured pineapple salad, instead of the raw papaya version . The lady I learnt thai cooking from in Thailand taught me that for getting the best flavours always make any paste/dressing in a mortar/pestle..who has the time really ;( I every time notice the difference in the taste due to this factor. Nonetheless, make up for the time factor by using really fresh ingredients..bottled dressings etc are a strict no-no in my kitchen ! To add to the presentation , you can serve this salad in the pineapple outer shell .. 


Ingredients (serves 4)

2 cups chopped pineapple
1 cup steamed corn
1 small capsicum, diced

For the dressing
1/3 cup roasted peanuts
1 tablespoon soya sauce
1/2 teaspoon lemon juice
1/2 inch Galangal ginger piece
1 teaspoon crushed white pepper
1 tablespoon balsamic vinegar
1 tablespoon maggi seasoning sauce
Salt to taste

1. Blend all the ingredients for the dressing till the peanuts are coarsely ground.
2. Toss in with the pineapple,corn and capsicum.
3. Serve chilled ,garnished with basil leaves and peanuts.


Monday 16 April 2012

Mango Cheesecake

The king has arrived :)) for all the cribbing about the summer and the heat and the humidity, who can take away the joy of slllllurping on yummy mangoes...this to me is one of the biggest joys of living in India..almost like a heritage to be proud of. Beginning the desserts spree with my all time favourite..mango cheese cake. Quite similar to the the raspberry one posted earlier, slight variations to adjust to the sweetness of mangoes ..enjoy!

Ingredients (serves 10)

For the biscuit base
15 marie biscuits
75 gm butter

For the gelatin mixture
1 tablespoon gelatin (I used veg gelatin)
200 ml Mazaa (or any other mango drink)

For the middle layer
200 gm mascarpone cheese (or cream cheese)
1 cup hung curd
6 tablespoons powdered sugar
For the topping
Pulp of 2 medium mangoes
4-5 tablespoons sugar (depends on the sweetness of the mangoes)

1. Powder the biscuits in the dry mixer till you get fine crumbs. Rub in the melted butter to get a crumbly mixture and spread this as the bottom layer of the dish. The thickness of the layer will depend on the size of the dish you are using.
I used a 10 inch borosil tray..you can even make individual cheesecakes in dessert cups/glasses..
Place the dish in the fridge for half an hour to set.
2. All ingredients for the middle layer should be at room temperature .Mix all the ingredients of the middle layer with a an electric beater till smooth.
3. Dissolve the gelatin in 200 ml of juice. Bring this mixture to a boil and reduce to a simmer for half a minute.
4.Add most of the gelatin mixture (leave about 2 tablespoons for the mango layer) to the cream cheese mixture. You have to be quick and start whisking with the beater immediately to remove any lumps that are formed.
5. Quickly pour this layer over the biscuit layer and leave to set for an hour in the fridge.
4. After an hour, add the pulp and sugar to the remaining gelatin mixture (which would have become like jelly by now..don't worry it will dissolve with the heat) Bring this mixture to a boil on a low flame and keep boiling till all the jelly is dissolved.
5. Pour this  mango mixture over the cream cheese layer and leave to set for another hour.


And this is pic of the top view...


Friday 6 April 2012

Mean Bean Burger


This one left me in a food coma ! But was a great experiment to introduce more protein into a vegetarian diet.. going to prefer this over the usual potato cutlet burger any day. Use your choice of condiments..mustard/lettuce/cheese/mayo..etc.The wholewheat burger buns made this a really 'wholesome' meal..

Ingredients (serves 4)

For the burger patty
1/2 cup rajma,soaked overnight
1/2 cup grated paneer
1 green chilly, finely chopped
2 tablespoons breadcrumbs
1 tablespoon grated cheese
1/2 teaspoon black pepper powder
1/2 teaspoon crushed garlic
1/2 teaspoon crushed ginger
Salt
chopped coriander
Olive oil

To serve
burger buns
tomato slices
cucumber slices
low-fat mayonnaise (optional)
lettuce leaves

1. Place the rajma in a steamer vessel and place the steamer in a pressure cooker. Cover the lid and keep on high flame. After 3 whistles, reduce flame for 25-30 minutes. Open lid when steam is released from the cooker. Cooking in steamer keeps the beans dry .
2. Mash the beans and add with all other ingredients. Shape into round patties. Coat with extra breadcrumbs (optional) and shallow fry in olive oil till brown and crisp on both sides.
3. Slice the burger bun in half and arrange the burger as per your liking..I buttered both sides lightly and sandwiched the patty between lettuce and mayonnaise and sliced vegetables..serve with mustard/ketchup..


Monday 2 April 2012

Pad Thai Spaghetti

I love Thai food and was lucky enough to learn how to cook authentic Thai food on a trip to Thailand in 2010.The only problem in cooking Thai is that a lot of the ingredients are so tough to source, especially kafir lime..been trying to grow some in my balcony garden, which at the rate its growing will be around when I might have retired from the kitchen :) Galangal ginger and bird's eye chillies are easily available in Hypercity and other such places..palm sugar I bought back home with me from Pattaya:) Do scout around for suppliers and you can really dish up some authentic stuff. I have cheated though slightly on this recipe, i used spaghetti instead of rice noodles as personally I am not fond of their gooey texture at all :)) these turned out really nice  ..

Ingredients (serves 4)

2 cups boiled spaghetti
1 medium broccoli, cut into florets
1 cup cabbage, finely sliced
1 cup bean sprouts
1 large capsicum,finely sliced
1/2 cup roasted peanuts, coarsely ground
1/2 teaspoon garlic,crushed
1 teaspoon galangal ginger,crushed
2-3 bird's eye chillies,sliced (or 1 green chilli)
1 1/2 tablespoon palm sugar (or brown sugar)
1 teaspoon dark soya sacue
1 tablespoon maggi seasoning sauce
2 tablespoons imli paste
Salt
2 tablespoons oil

1.Whisk together the soy sauce,sugar,maggi sauce, imli paste and set aside.
2. In a wok,heat the oil and fry the ginger ,green chili and garlic for about half a minute on high flame. Add all the vegetables and again cook on high flame for 4-5 minutes till tender( but not completely cooked)
3.Toss in the spaghetti with the vegetables.
4. Add the mixed sauces and little salt and toss on high flame. Adjust seasoning as per your taste.
5. Add the crushed peanuts and serve hott

Friday 30 March 2012

Hare Bhare Pakode

An evening tea party is completely incomplete without pakodas and loads of gupshup..so while the English need to be certainly thanked for the concept of high tea with muffins and scones ,I am still a desi at heart when it comes to tea parties..pakados and biscuits (or biscoots :))!! Why not make some healthy ones since we are at it ..these combine the wonderful grainy texture of chana dal with the bitter flavours of methi..you can even make them in the tandoor and then you would have complete guilt free indulgence..

Ingredients (makes roughly 35 pakodas)

1 cup chana dal , soaked for 5-6 hours
1/2 cup spinach puree
1 cup chopped methi leaves
1/2 cup chopped coriander leaves
2 green chillies ,finely chopped (reduce as per taste)
1 tablespoon ginger paste
1 tablespoon jeera
1 teaspoon ajwain
Salt
1 onion, finely chopped
2 tablespoons rice flour (this will give you extra crispy pakodas)

1. Grind with dal with very little water, as minimum as possible.
2. Heat oil for frying in a kadhai.
3. Mix all the ingredients together and fry in hot oil,a spoonful batter for each pakoda. Reduce the flame to medium so that the pakodas are cooked thoroughly from inside as well. Toss in the oil till the outer colour is a nice brown colour..don't overcook as the outside will taste burnt.
4.Sprinkle with chat masala/amchoor powder
5.Serve hot with green chutney/ketchup...bet you won't be able to stop :)

The pakodas are brown on the outside but a lovely green colour inside..


Tuesday 27 March 2012

Low cal Methi Mattar Malai

There is a restaurant called Dara's dhaba on the highway after Borivali /Dahisar (for those of you familiar with Mumbai ) which once upon a time was my family's pick for every dinner/birthday/celebration..for its true punjabi food. My sister and I always ordered the same food ! - Dal makhani and Methi mattar malai..both to die for..can still remember the taste! So over the years I have experimented and come up with this original version of mine which comes pretty close to the taste I grew up with..except that the malai part of it is really for namesake..unlike what Mr Dara was serving up!

Ingredients (serves 4)

1 cup methi leaves, chopped finely
1 cup peas
1 onion,finely chopped
1 tablespoon oil
1 green chilli,finely chopped
1 teaspoon crushed ginger
1 elaichi
1/4 inch cinnamon piece
12 cashewnuts soaked in 1/2 cup water
1 cup water
Salt
1 tablespoon sugar (adjust according to your taste)
1 teaspoon garam masala
1 tablespoon cooking cream

1.Heat the oil. Add the elaichi and cinnamon and let the oil smoke for a few seconds with the flavours.
2. Add the ginger and green chilli and fry for a few seconds.
3. Add the onion and cook till soft.
4. Add the peas and methi and salt and cover with a lid. Cook on slow flame till the peas become tender (roughly ten minutes)
5. Meanwhile puree the cashewnuts into a smooth paste with the water.
6. When the peas are cooked, add this paste,sugar,garam masala and addtional water. (you can increase/reduce the quantity of the water based on your preference)
7. Let the gravy boil for 3-4 mintues for a slow flame.
8. Add the cream and serve hot with parathas ...balle balle :))


Monday 26 March 2012

Tandoori Bharwan Mirch

There is a hint of winter in the air..a slight nip in the mornings (the good part) , the drying skin (the definitely not so good part) and of course the slowly arriving winter veggies (for me this is the best part) . I have already inaugurated this arrival with Sarson ka saag and now looking forward to the gajar halwa and other delights soon . If you are a fan of pickles, then this is the season of the stuffed red chilli pickle and the gajar-gobi-shalgam pickle ....with gobi parathas ..slurppy thoughts should be racing in the mind reading this of course ! Red chillies are still to arrive but I bought some really fresh green ones today and made this tandoori rendition of the stuffed variety. Don't have an oven or tandoor, then simply shallow fry these in oil ..works great as a side dish


Ingredients

4 achari capsicum (chilli shaped capsicums)
Oil for greasing
Lemon, to garnish

For the stuffing
2 tablespoons roasted peanuts,peeled
2 tablespoons saunf
1 tablespoon coriander powder
1 teaspoon amchoor powder
Salt (approx 1 teaspoon)
1 small onion,chopped
1 tablespoon besan
1/2 teaspoon crushed ginger
1/4 teaspoon haldi powder
1/2 teaspoon red chilli powder

1.Wash the chilli peppers ,dry and cut in half. Slit each half vertically taking care not to slit completely.
2. Grind all ingredients of the stuffing in a mixer.
3. Stuff the chillies ,not over stuffing as that will result in mixture spilling out after cooking.
4. Pre-heat the tandoor and place chillies on the greased tray. If you are using oven ,pre-heat to 250 degrees Celcius and place chillies on the greased tray.
5. Brush the top of the chillies with some oil and leave to cook till well done and brown, this takes about 5-6 minutes in the tandoor, longer in the oven.
6. Serve hot with lime on the side


'How to' series - how to cook rice

Getting queries from some bachelor friends wanting me to post on some cooking fundamentals :) so figured might as well use the time in between actual recipe posts to start this series for those that have newly entered the cooking arena . You can look for the label 'how to' on the right side of the blog to keep checking the posts in this series. Starting with the basics on how to cook rice...something that even I took long to figure out. Well there are three ways to cook rice
1. In a pressure cooker
2. In a pan
3. In a pan with the extra water drained away  (used for chinese/biryani etc..where the rice is cooked separately and needs to be mixed with other stuff) This method also supposedly drains the starch away and makes rice less fattening but I personally feel some of the taste is also drained away :)

For all three ways, wash and soak the rice for ten minutes in water. Discard this water and then fill your vessel as per the method you are using..
1. For pressure cooker, add water 1.5 times the rice quantity (before soaking) So for 1 cup rice use 1.5 cups water and so on. Add the soaked rice to the water,salt as per taste and cover the lid of the cooker. Place on high and after one whistle, reduce to sim for 5-6 minutes. Turn off the gas and wait for the whistle to release the steam on its own before opening the cooker.

2. If making in a pan add water 2 times the rice quantity and bring to a boil . When the water is boiling add the rice and cover with a lid ,reduce the gas to a sim. Leave the lid very very slightly open so that the water does not boil out. After the water has dried up (time depends on the amount of water and rice..roughly 7-8 minutes for 1 cup rice) , shut the lid tight and turn off the gas. You can add some wight on the the lid so that the steam is not released. After 10 minutes you can take off the lid when the rice would have fully cooked in the steam.

3.This is the easiest method. Add the rice and 3.5 -4 times the water. When boiling add the rice and keep the flame on medium high. When the rice grains look cooked ,check with a single grain to see if it is cooked , should be almost cooked and not feel grainy at all. Turn off the gas and drain all the extra water with the rice in a sieve. Put the drained rice back in the pan and cover with the lid for 3-4 minutes and it's ready to eat..

No photos to show for this recipe :))))

Tuesday 20 March 2012

Baked Bread Roll

Today is World Sparrows Day :)!! so how could I not write a post ! These little birds are now unfortunately a disappearing species and you can lend your support to increase their numbers by simply putting out little feeders for them in your balcony/garden with grain and water..please check this link http://www.worldsparrowday.org/ to pledge your support.
Back to this post which I was actually saving for Sunday as this is a real Sunday special when the oats/cornflakes daily breakfast can take a backseat. Bread rolls are anyone's weak spot but this makes them guilt-free indulgence:)

Ingredients (makes 7-8 rolls)

3 medium potatoes, boiled
1 green chilli, finely chopped
1 small onion, finely chopped
1/4 cup chopped coriander leaves
2 tablespoons grated cheese
Salt
1 teaspoon chaat masala
Pinch haldi
1/2 teaspoon pepper powder
4-5 mint leaves, chopped

7-8 bread slices (I used brown bread)
Olive oil

1. Pre-heat oven to 200 degrees Celcius
2. Peel and mash the potatoes and mix with all other ingredients.
3. To make the roll , put water in a saucer and dip the bread in ..just dip and take out. Also if the bread is large sized, you can trim the edges..but the edges actually give a nice crunchy taste.
4. Place the soaked bread on your left palm, place a tablespoon of the mixture in the center of the bread. Now with your right hand, lightly fold the four corners of the bread over the potato mixture.
5. Then cup the folded edges with your right hand and roll the bread between both hands cupped. Gently press the bread as you roll between your hands to seal all the sides well...this can take some practise to perfect !
6. Brush the roll on all sides with olive oil and place on the center rack of the oven and bake till golden brown and crisp .
7. Serve hot with ketchup or green chutney 


Thursday 15 March 2012

Eggless Whole Wheat n Oat Muffins

Had a 'Low Cal Desserts ' cookery contest in my gym yesterday.. I missed taking part in it as I was unaware about the contest ! (just thought the notice put up for it was one of the usual do's and dont's notice :) Anyways , got me thinking what would I have made had I entered ..and this is what I came up with..muffinswith no maida, hardly any oil/butter and almost sugar-free (honey is a naturally great source for sugar ) Adapted this from joyofbaking.com ..verdict please !:)


Ingredients (makes 12 muffins)

1 cup atta
1 cup oats (I used regular Dr Quackers)
1 cup grated carrot
1/3 cup brown sugar/demerara sugar
1/4 cup yoghurt
2 tablespoons oil (regular vegetable oil)
1 1/2 teaspoon baking powder
1/2 teaspoon baking soda
1 teaspoon vanilla essence
1 teaspoon ground cinnamon powder
1 1/4 cup (300ml) skimmed milk
1/4 honey

1. Pre-heat oven to 180 degrees Celcius
2. Grind the oats in the dry grinder into a fine powder
2. Mix all the dry ingredients together in a bowl (flours,sugar,baking powder,baking soda,cinnamon powder,carrot)
3.Mix all the wet ingredients in another bowl (yoghurt,oil,milk,vanilla essence)
4.Add the wet mixture to the dry ingredients and whisk till just mixed.
5.Divide into muffin cups lined with cup cake paper liners.
6. Bake on the center rack for 18-20 minutes till toothcpick comes out clean.
7. Serve warm :)


Tuesday 13 March 2012

Pind De Chole

Another one of my favourite recipes handed down from my mom..we call these 'keechadh chole' at home :)) only because of the colour and nothing else as they taste divine ! Pretty close to the real deal of the chole served up north with piping hot and humongous bhaturas..I think only Bombay Blue serves up this dish's authentic taste..off course the amount of ghee/oil they add definitely helps! feel as free as you like :)) also you can adjust the spice content (green chilli and pepper) and the sour content (imli paste) as per your personal preference ..but the authentic taste is realllly chatpata and spicy!

Ingredients (serves 4)

For boiling
1 1/2 cups kabuli chana
1 1/2 teaspoons methi seeds
1 bay leaf
2 tea bags
Salt to taste

For paste
3 tablespoons jeera
3 tablespoons coriander seeds
1 badi elaichi
2 tablespoons pepper corns
1 large onion

3 tablespoons oil
1 large onion, finely sliced
1 green chilli, finely chopped
1 tablespoon ginger paste
3-4 tablespoons imli paste

Green chillis and onion to garnish

1. Soak the chana overnight or 6-7 hours with the methi seeds .
2. In the pressure cooker, add the soaked chana with the teabags, bayleaf and salt. Add enough water that the level of the water two finger tips above the chana. Place on high flame for 4 whistles and the reduce to simmer for half an hour.
3. Soak the masalas for the paste in little water (about 1/4 cup) while the chanas are boiling. Grind the masalas with the onion into a smooth paste.
4. Heat the oil, fry the ginger paste and green chillies for a minute. Add the sliced onions and fry on medium flame till light brown in colour.
5. Add the masala paste and fry till the paste dries up and becomes a rich dark brown colour. Add the imli paste.
6. Open the cooker after the steam has released, discard the tea bags and the bay leaf and add the chanas to the simmering paste.
7. Let the chanas simmer for as long as possible, minimum half an hour atleast..if drying up add some water.
8. Serve with bhaturas or puris ..finger licking good !


Monday 12 March 2012

Rice Stuffed Bell Peppers

This is an interesting way to use left over rice..ideally the recipe would taste really great with risotto rice which will also work well with the flavours of the recipe. Also you can make the rice with any variation you prefer but choose this way of serving up your creation..looks impressive ! The topping of grated cheese adds that extra yummy bite (which I usually save for the last :)))

Ingredients (serves 4)

3 yellow bell peppers ,halved vertically

1 tablespoon olive oil + extra for greasing
1 garlic pod, crushed
1 small onion, chopped finely
1 1/2 cups rice
1/2 cup chopped baby corn
1 capsicum, chopped finely
1 tablespoon tomato ketchup
1 teaspoon mixed herbs
1/2 teaspoon black pepper
1/2 teaspoon chilli flakes
Salt to taste
Grated cheese
Basil leaves, to garnish

1. Pre-heat oven to 200 degrees Celcius
2. Heat the oil , add the garlic and onion and fry till the onion is soft.
3. Add the baby corn and capsicum and cook for 3-4 minutes till soft.
4. Add the salt,ketchup,chilli flakes, pepper and stir in the rice . Toss for 1-2 minutes.
6. Turn off gas and let the rice cool a bit. Meanwhile lightly grease the oven tray with olive oil, brush some oil on the bell pepper as well
7. Stuff the peppers with the rice and top each with some grated cheese..use regular cheese or mozarella
8. Bake for 15-20 minutes till the bell peppers are charred slightly and cheese crust is browned.
9. Serve as a side dish , garnished with basil leaves..


Sunday 11 March 2012

Carrot Kofta Curry

Trying to make the most of the season's veggies which are on the last leg of their journey in the markets here :) already saw someone selling mangoes yesterday ! my mind was bursting with all that I want to try out with mangoes but think I'll wait another month more for the 'real' deal..too much stuff in the papers about fruits being bombarded with chemicals to make them ripen way before nature would have taken its course. Anyway back to this recipe, a nice variant from the usual lauki koftas..do try !

Ingredients (serves 4)

For the koftas

2 medium carrots ,grated
3/4 cup paneer, grated
3 tablespoons besan
Salt to taste
Pinch of haldi
1/2 teaspoon ginger paste
1/2 teaspoon red chilli powder
1/2 teaspoon ajwain

8-10 cashewnut pieces
Oil for frying

For the gravy
2 medium onions
1 green chilli
1 inch ginger piece
3 small garlic pods
3 large tomatoes
Salt
1/4 teaspoon haldi powder
1 tablespoon garam masala
coriander for garnishing
1 1/2 cup water +1/2 cup water with 1 tablespoon cornflour dissolved 
2 tablespoons 

1. Heat the oil in a kadhai for frying the koftas.
2. Mix all ingredients of the koftas, shape into balls and fry immediately on a medium flame till browned on all sides. Remove and drain on paper.
3. For the gravy, heat the oil. Grind the onions,green chilli,garlic and ginger into a smooth paste. Add the paste to the oil and fry for 5-6 minutes till it is a nice brown colour. If the paste sticks to the bottom of the pan, it will dissolve when the the tomatoes are added.
4. Puree the tomatoes in the mixer and add to the onion paste. Again fry on medium flame till the oil leaves the sides. Add the masalas and fry again for 2-3 minutes.
5. Add the plain water and bring to a boil , then add the cornflour water mixture and let it simmer for 2-3 minutes.
6. Add the koftas just before serving so that they retain their shape . Garnish with coriander and serve with parathas ...


Thursday 8 March 2012

Beans Foogath

Firstly Happy Holi everyone :)) and I am slightly guilty that I did not post any Holi special recipes but honestly I only made Gujiyas this afternoon and that too superfast ones with no time to measure out anything to post .I did try a variation and added crushed pistas to the Gujiya filling and it did make them yummmier :) So mental note made to be 'prompt' before the festival is over!..well leftover coconut and beans lying around in the fridge initiated this recipe. So foogath is basically any vegetable cooked with coconut and curry patta..I remember having eaten 'cabbage foogath' as a salad actually on a Sunday brunch outing..super easy recipe that you can try out with any vegetable really.

Ingredients

2 cups finely chopped beans
1/2 cup grated coconut plus extra for garnishing
1 green chilli,finely chopped
1 teaspoon ginger paste
pinch heeng
1 teaspoon rai seeds
1 teaspoon urad dal
1 small onion,finely chopped
8-10 curry patta leaves, chopped
Salt to taste
pinch haldi
1 tablespoon oil

1. Heat the oil. Add the heeng,rai and urad dal and fry till dal turns light brown.
2. Add the ginger,green chilli and the curry patta leaves and fry for a few seconds.
3. Add the onion and cook till soft.
4. Add the beans ,salt and cover the lid reducing the flame to low. Cook fo 8-10 minutes stirring in between till beans are soft. If the beans are sticking to the pan and getting brown, add 1-2 tablespoons of water to let some steam build up.
5. Add the coconut, haldi and cook for 3-4 minutes on low flame,lid covered.
6. Turn off the gas, garnish with freshly grated coconut and some curry patta leaves..serve with parathas and curd :)


Tuesday 6 March 2012

Vanilla Fruit Cream

No food memory is as closely associated with my mom as this dessert is ..an all time favourite of mine which she still makes when she is in a mood to treat me with some good ol' favourites....moms! sigh! While the original recipe uses only cream, this low(er) cal version hardly uses any cream..also I had some whole vanilla pods lying around from my trip to Kerala so I used fresh vanilla (that's what the little black dots in the picture are :)) but you can substitute with vanilla essence. Also for best results stick to the fruits used , only welcome addition is mango :) You can vary the quantities of ingredients to create the perfect dessert with taste and texture suited to your palate..

Ingredients (serves 4)

2 bananas,diced
1 cup grapes, cut into halves
3 cheekus, peeled and diced
1 apple, peeled and diced
10-12 strawberries, cut into medium sized pieces
Juice of one lemon
2 cups cold skimmed milk
1/2 cup powdered sugar
2 tablespoons cream
1 vanilla pod Or 1 teaspoon vanilla essence

1. Mix all the chopped fruits with the lemon juice and toss well, this prevents the apple and banana from turning black.
2. Add the sugar ,cream,milk and essence and toss hard so that the fruits mix well with the milk . You can add extra sugar /cream as per your taste. If you are using a vanilla pod, slit the pod vertically and scoop out the vanilla with the back of a spoon.
3. Chill for 4-5 hours before serving.
4. Serve in individual glasses garnished with kiwi/strawberry slices


Tuesday 21 February 2012

Eggless Date n Walnut Cake

I am so happy that my blog has initiated my cousin into the beautiful world of baking :) Baking is something that can be addictive, for me it is the most personal way to share some great food moments..an evening of tea with close buddies and a freshly baked tea cake is an evening well spent :) Of late I have been trying to do more and more of eggless baking as I don't have to worry then of who to feed the goodies to :)) And yes , the idea to try this cake came from a recent trip to the mall where a very smart sales lady tried to sell me a face cream made from dates but priced soooooooo steep that I thought.. I might as well find ways to eat more dates :)))

Ingredients (makes 8-10 pieces)

1/2 tin (200 gms ) condensed milk
50 gms butter, room temperature
50 ml milk
3/4 cup flour
1 tablespoon cocoa powder

1/2 teaspoon baking powder
1/4 teaspoon baking soda
1/2 cup dates ,pitted

1/2 cup walnuts
1/2 teaspoon vanilla essence

1. Soak the dates in one cup of lukewarm water for half hour.
2. Pre-heat oven to 250 degrees (actual baking temperature will be 175 degrees)
3.With an electrical mixer, beat the condensed milk and the butter for 3-4 minutes till creamy in texture
4.At speed 1 of the beater, mix in the milk and the vanilla essence.
5.Sieve the flour,cocoa,baking powder and baking soda all together.
6.Beat in the flour mixture,adding little bit at a time . Continue beating for 3-4 minutes.
7.Drain off most of the water the dates are soaked in and grind the dates into a pulp.
8.Fold in this pulp into the cake batter and stir in the walnuts as well.
9. Pour the batter into a greased tin (I used a 5X7 rectangular inches tray) and bake at 175degrees in the center rack for around 40 minutes  or till a toothpick inserted in the center comes out clean.
10.Serve warm freshly baked..


Thursday 9 February 2012

Instant Khandvi

I am a big fan of Gujarati snacks,especially khandvi and dhokla but sadly lack the expertise in making them taste as authentic..I have made khandvi once before and although the end product was not bad, the whole task of constantly stirring the batter in the kadhai till my wrist hurt ,followed by the stress of plating it so quickly left me with no desire for a repeat performance! Till I came across this variation in the method which involves no stirring :))) yes you still have to be quick with spreading the mixture on the plate..but practise will make perfect!

Ingredients

For the batter
1/2 cup heaped besan
 2 tablespoons curd whisked into 150 ml water
1 teaspoon ginger-green chilli paste
1 teaspoon salt
pinch heeng
1/2 teaspoon haldi
1/2 teaspoon sugar
1 teaspoon lemon juice

For the tempering
1 tablespoon oil
1 green chilli finely chopped
1 teaspoon rai seeds
3-4 curry patta leaves, chopped
Coriander to garnish
2 tablespoons water

1. Mix all the ingredients of the batter well, removing all lumps.
2. Pour 1 cup of water in the pressure cooker and place the vessel with the batter in the cooker. Cover the lid and turn the flame on high.
3. Give 7 whistles , keeping the flame high throughout..pay attention to the counting :)) Turn off the gas
4. Keep 2 greased thalis ready (grease the back of the thali with very little oil,too much oil will not let the batter spread easily) ..I used two thalis of 10 inch diameter
5. Once the steam is released from the whistle,open the cooker and take out the vessel. Whisk the batter once again quickly with a whisk. Then drop half the batter on one thaali and spread into a very thin layer with a spatula. The layer should be as thin as possible. Repeat the process with the second thaali..speed is they key as the batter thickens very quickly!
6. When the spread batter has cooled, cut into strips with a knife and roll each strip with gentle hands.
 Place all the rolls on a plate.
7. For the tempering, heat the oil. Add the rai, when the rai splutters, add the curry patta leaves and the green chilli. Fry for few seconds , turn off the gas. When this cools add the water and pour the tempering uniformly over the khandvi.
8. Serve fresh garnished with coriander leaves


Monday 6 February 2012

Strawberry Crumble Cake

Was in a mood for Strawberry tart but personally I can't enjoy the taste of a tart without ice-cream ..given the weather, decided to experiment with a nice warm cake instead. Again from my favourite site joyofbaking.com..I liked the idea of strawberries sandwiched between a soft cake texture at the bottom and a crisp crumbly texture on the top..yum!

Ingredients (serves 8)

For the cake batter

1 cup all purpose flour
1 teaspoon baking powder
1/4 cup (50 grams) (4 tablespoons) butter, room temperature
1/2 cup (100 grams) powdered white sugar
1 large egg
1/2 teaspoon pure vanilla extract
1/3 cup (80 ml) milk
1 cup fresh strawberries
For the topping
1/3 cup all purpose flour
1/3 cup granulated white sugar
1/2 teaspoon ground cinnamon
1/4 cup cold butter, cut into pieces
1. Preheat oven to 175 degrees C.  Grease a 6 inch round cake pan.
2. For crumble topping:  In a large bowl, mix together the flour, sugar, and ground cinnamon.  Cut in the butter with a pastry blender or fork until it resembles coarse crumbs.  Set aside while you make the cake batter.
3.In a separate bowl whisk together the flour, baking powder, and salt.  Set aside.
4.With an electric mixer, beat the butter until smooth.  Add the sugar and beat until light and fluffy.  Add the egg and vanilla and beat until incorporated.  Add the flour mixture, alternately with the milk, and beat only until combined.  
5.Spread the batter onto the bottom of the prepared pan (see pic below)

6.Evenly arrange the strawberries on top of the cake batter and then sprinkle with the crumble topping.
7.Bake for about 40 - 45 minutes or until a toothpick inserted in the center of the cake comes out clean.  Remove from oven and place on a wire rack to cool slightly. 
8.Serve warm


The cake batter topped with the strawberries
The batter with the crumble topping


Cake just out of the oven